A construction atlas of the armhole
The sleeve starts before the arm.
Sleeve names stop being confusing once you see the few construction moves underneath them.
A sleeve is a decision about where the garment changes direction.
Look at the seam before you look at the cuff. A set-in sleeve begins at a shaped armhole. A raglan runs diagonally to the neck. A kimono sleeve grows out of the bodice itself. Those three moves explain more about fit and motion than any catalog of decorative names.
Sleeve names mix construction, outline, length, and history. A bishop sleeve is volume gathered into a cuff. A cap sleeve is about coverage. A leg-of-mutton sleeve is a silhouette, full above and narrow below. One sleeve can answer to several names because each name notices a different fact.
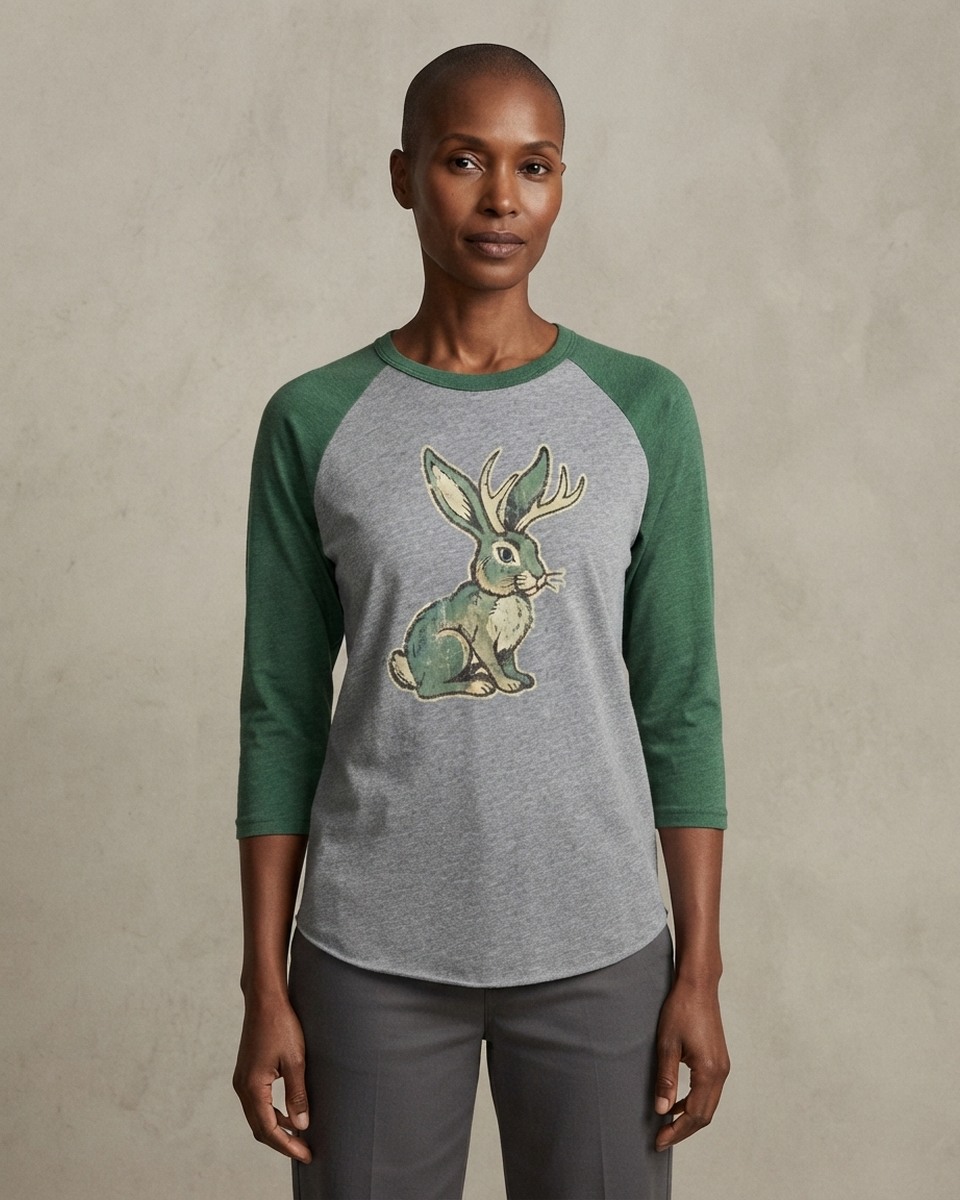 AI concept render
A shaped cap joins a shaped armhole
The seam travels from underarm to neck
Sleeve and bodice share one pattern piece
The shoulder line moves down the arm
Extra cloth concentrates at cap or cuff
The sleeve widens toward its opening
Names drift. Measurements don’t.
Historical sleeve names migrate. Gigot and leg-of-mutton get used for the same full-at-the-top shapes. Bell and flare both mean a widening opening, built any number of ways. Commercial clothing calls almost any cut-on sleeve a kimono sleeve, whether or not the garment has anything to do with a kimono.
Use the name to find references, then write down what you can see: where the seam sits, how long, how full, what happens at the cuff, what cloth, how it should move. A factory cannot sew an adjective. It can sew a pattern with measurable geometry.
The armhole is a hinge.
A high, closely shaped armhole can give surprising freedom, because the body of the garment doesn’t have to travel far when the arm lifts. A low armhole gives room while the arm hangs, then drags a bigger section of the body up with it in motion. Extra cloth doesn’t buy extra reach.
The sleeve cap matters too. A tall cap makes a vertical, tailored sleeve with less spare cloth under the arm. A shallow cap spreads width and ease across the upper sleeve. Fabric, shoulder structure, and the pose you’re designing for all change the result.
Ease only helps where the pattern put it.
Patternmakers use ease for the difference between the body and the garment. That extra room isn’t equally useful everywhere. A sleeve can be wide at the biceps and still fight a forward reach if the cap, armhole, and shoulder don’t agree. A trim sleeve can move beautifully when its hinge sits close to the body. Don’t ask how wide the sleeve is. Ask where the pattern made room to move.
So a fitting needs actions, not a still pose. Reach for a shelf, fold your arms, and watch whether the cuff climbs, the shoulder collapses, or the whole shirt comes along for the ride. Drag lines point straight at the problem.
A sleeve has a resting angle.
Arms don’t hang like columns bolted to a mannequin. They rest slightly forward, and posture changes the angle. A tailored sleeve is set in with a pitch, a rotation that lets it hang clean in that resting position. Rotate it too far forward or back and the fabric spirals. The sleeve fits the arm on paper and twists on the body.
Stretchy knitwear hides small pitch mistakes. Dense woven cloth doesn’t. That’s why you can’t lift a sleeve from a favorite T-shirt and drop it into a canvas jacket: the canvas won’t stretch to cover the error, and the jacket needs room for a shirt underneath and an elbow bent toward a handlebar.
Sleeve and armhole change together.
Change the cap height, the shoulder position, or the width up at the cap, and you change the length of the seam that has to join the armhole. Change the armhole and you change mobility and cap ease. That coupling is why “make the sleeve bigger” tends to create a new problem at the seam or the shoulder. The two pattern pieces are a matched edge even when their outlines look unrelated.
When you revise, keep the two seam lengths in the relationship the pattern intended, since a set-in cap is often a little longer than its armhole on purpose, and mark notches for front, back, shoulder, and balance points. Walk the paper edges together before cutting cloth. A sleeve makes more sense once you stop treating it as an accessory and see it as half of a moving joint.
Volume needs an address.
A puff, bishop, balloon, or lantern sleeve isn’t just big. The patternmaker decides where the extra cloth starts and where it gets caught. Gathers at the shoulder make the upper body louder. Fullness released below the elbow changes the rhythm. A firm cuff turns soft cloth into a contained shape.
The same outline behaves differently in organza, jersey, washed linen, or dense wool. Crisp cloth holds air between sleeve and arm. Fluid cloth collapses into folds. Before asking for a dramatic sleeve, decide whether the drama should stand, swing, or pool.
Material can redraw the same pattern.
Cut one full sleeve in cotton voile, silk organza, sweatshirt fleece, and rib knit. The voile breaks into many small mobile folds. Organza holds a shell of air. Fleece goes blunt and sculptural. Rib lengthens, clings, and pulls the fullness down. Nothing on the paper changed. Stiffness, weight, friction, and stretch changed what gravity could do with it.
So a reference should describe behavior as well as outline. “Like this photo” is incomplete if the photo is crisp taffeta and the plan is washed jersey. Should the sleeve stand off the arm, collapse against it, swing with a delay, or stay put? Pick the verb, then pick a cloth that can perform it.
The cuff controls everything above it.
A buttoned shirt cuff needs a placket so the hand can pass through a narrow finished opening. Rib at a sweatshirt cuff stretches to let the hand through, then recovers and holds the sleeve in. Elastic gathers light cloth without a tailored opening. A flared sleeve skips containment entirely and turns the moving hand into the end of a pendulum.
Opening size changes use, too. A bell sleeve dips into the sink. A tight cuff traps a watch. A thumbhole adds warmth but locks sleeve length to hand size. Expressive sleeves are still worth it. Just know the last five centimeters decide whether the design survives a Tuesday.
Layers share one armhole.
A coat sleeve has to contain the sleeve under it without bunching both into one bundle. Tailoring uses a slippery lining, a slightly different sleeve shape, and extra reach at the elbow. An insulated jacket needs room for loft, because squashed insulation loses the air it was supposed to hold. A close base layer has the opposite job: move with the skin and leave no ridges under everything else.
Try the jacket over the thickest layer it will meet. See whether the cuffs stack awkwardly and whether the underlayer pokes out when the arm lifts. Layering ease is space placed where several garments have to bend together.
Write the sleeve down as facts.
A useful sleeve brief names the construction family, seam position, length, circumference at a few points, where the fullness lives, the opening, and the motion you want. Something like: shallow set-in cap, slight drop at the shoulder, generous biceps, taper from the elbow, two-button cuff, enough reach for a steering wheel.
Then test the sample in the real cloth. Check the pitch front and back, lift the arms, bend the elbows, and watch the body of the garment while the sleeve moves. A good sleeve still folds. Its folds just make sense for the movement. Some wrinkles are a failure, and some are the visible price of being able to move.
Choose the seam, then choose the silhouette.
A sleeve can make a shirt feel precise, relaxed, athletic, romantic, or strange before color shows up. Start where the garment meets the shoulder. The rest of the sleeve follows from that first line.